How to Configure Initial WHM Settings On a Dedicated Server
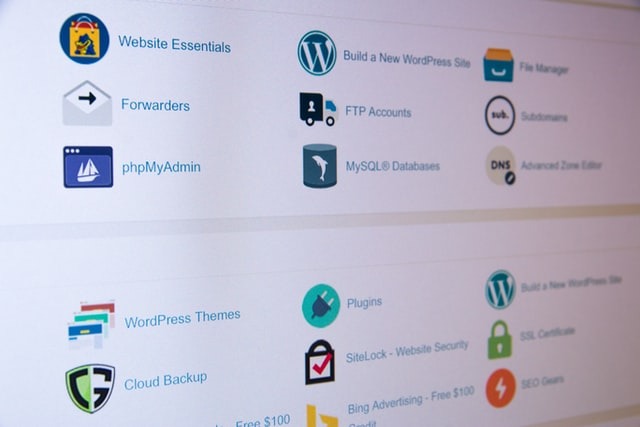
Photo by Stephen Philips on Unsplash
When you host on a dedicated server, you’re giving yourself additional security and power to ensure your website and network are fully functional. Managing your website is a crucial part of maintaining that functionality. Hosting on a dedicated server requires constant maintenance and careful attention to every detail. You can manage your site easily with a cPanel and WebHost Manager (WHM). The WHM setup process can be a little tricky if you aren’t used to it. However, when you use HostForWeb for your dedicated server, the configurations are already preset for you.
How to Log In
Once you sign up and get your account settled, you’ll be given a URL that will ask for your account login information. You can always access your WHM with a root password via the main IP https:/MAINIP:2087/ After you are logged in, you’ll need to agree to the user agreements and confirm your email address. The email address entered will be public knowledge for your DNS zone, so make sure it’s not your private email. Any other information you may need for this process should be provided VIA an email after setting up your server account.
Set Contact Information
If there’s any problem with your server, you’ll need up-to-date and accurate contact information to be alerted. When configuring your WHM, you’ll be prompted to confirm your contact information and supply any missing fields. Without the proper contact info, you could have problems on your server you are unaware of. If you have someone in your company who is assigned to handle server data and operation, it may be a good idea to include their contact information in this section.
Update Root Password
When you first log in, your password will be the root password set by the initial configuration. You’ll want to change this as soon as possible to ensure complete safety. It is recommended that you choose a password that is difficult to guess and that isn’t personally related to you or your company. A random assortment of letters and numbers will keep your server protected.
Host Name
Every server on the internet has its own unique hostname. This is what separates it from other servers and sites, making it truly dedicated to your business. When you get started, your server provider may configure this for you. If they don’t, you’ll need to go to your WHM’s network settings and select the ‘change host name’ option to ensure your hostname is unique and up to date.
Basic WHM Settings
As a server owner, there are a few options you’ll want to ensure are properly configured at a minimum. When setting up your WHM, make sure that the server’s main IP is properly set and running as it should. If you haven’t already, confirm that the contact email is accurate so you can receive updates on your server as needed. Finally, read the below section to ensure your nameservers and A-records are properly set up.

Photo by Taylor Vick on Unsplash
Nameservers
Nameservers are a great way to host your own DNS entries on your server and sites. This helps you maintain domain branding across the internet whenever your server is looked up. Under the service configuration section of your WHM, you can find a ‘nameserver selection’ link that will allow you to choose the nameserver you wish to use.
Under the DNS functions section of your WHM, there is also a ‘DNS zone manager’ option that will let you edit your hostname’s zone file. Once you’re in the edit menu, follow these steps to complete your nameserver setup:
Add A records for NS1 and NS2 entries.
Change the NS entries to your nameservers.
Click Save. A confirmation message will appear.
Go to your registrar’s website.
Change the nameserver records for your main domain to point to your own nameservers. Most of the time, you’ll be required to register the nameservers with the registrar before this change goes live.
cPanel Account
The cPanel is another tool that helps you manage your websites. You can create your cPanel account from the account functions section in your WHM. You’ll be asked for your domain name and prompted to create a strong username and password. You will then be able to log in to the cPanel and access its unique and powerful systems.
WHM Settings FAQ
How do I access WHM?
You can access your WHM by navigating to a specific URL based on your server’s IP address, most commonly something like https://YourServerIPAddress:2087/. The initial WHM setup and configuration need to be accessed from the IP address your server is hosted on.
How do I create a new user in WHM?
Under the account options, you’ll be able to add and remove users by creating accounts for them. In order to give them root access, such as when hosting resellers, you’ll need to modify their permissions in the reseller modifications tab.
What is the difference between cPanel and WHM?
WHM and cPanel are two different interfaces that help run the server from the same engine. Both allow you to maintain control of your server and customize your settings. The main difference is usually in who works with the interface. WHM is designed as the interface level for server owners, providing detailed management and control over everything. cPanel is designed as the interface level of end-users, allowing them to have management and control over their own websites, but not affecting server-wide settings.
How do I access cPanel accounts through WHM?
Under the account feature of your WHM, you’ll be able to create and manage all your cPanel accounts. Users can be added, modified, and removed, and different settings can be managed to help end-users with their goals.
Hosting on a dedicated server gives you great protection and power. Setting up your WHM settings can be a hassle; that’s why HostForWeb fully manages your dedicated servers and preconfigures these settings for you. All of the aforementioned settings are already taken care of by the time you’re ready to get started hosting with your own dedicated server. With our team by your side, you don’t have to struggle through understanding everything or fear of putting the wrong information in. If you want to manage your own dedicated server and complete your WHM configuration with ease, contact us today at 1-833-201-8322.